Showing posts with label cricut. Show all posts

December 12, 2010

I Won!

For the first time I entered a card into blog challenges. A week or so later I was surprised when I was reading new posts from the blogs I follow and all of a sudden I read my name and saw my card! I won!
This on its own was exciting as I've only recently gotten into blogging and this was the first card I entered for challenges.. so I sent an email to claim my prize and was told as that weeks winner I had the opportunity to be a guest design team member for the following week.

You can check out the post over at Anyone for Anya? About halfway down under this weeks challenge my card shows my take on Shabby Chic Christmas.

I used the shadow box card again, but this time made it larger.
I stamped the word background on blue paper, cut a lace design on the cricut in some shimmer white paper. A few pearls were added to the sides, and of course the image is coloured with copics.


If you would like the lacey cut file head over to The Scrapoholic and you can download it for free!
*Its the third one down called Scrolled Lace Mesh

December 2, 2010

Straying from the holidays

I havent used my cricut for so long. It sits on a shelf above my desk right in front of where I sit when I'm working on something. I look at it almost every day but the laziness in me thinks about hooking it up to the laptop (I use Sure Cuts A Lot) and clearing a spot on the desk for the paper to move freely. Needless to say I dont use the Cricut as often as I should.

The svg cuts the paper to the right size to add to the card, and cuts the flower petals as well as a hole in the center of each flower. I dont remember where I got this svg from. I've searched for free svg's and have a large collection, unfortunately I didnt organize them to remember where I found them.

I used a regular white card as the base and added the purple paper cut from the cricut to the front. The flower petals are cut so you can bend/fold them up to add dimenion. I used a copic marker for the yellow middle, then used sparkle embossing powder on the petals.

The stamp is from Whiff of Joy and I think she is so adorable. She's coloured with copics and I'm really pleased with how she came out. I think I'm starting to get better with shading and blending!


Click to view larger


March 17, 2010

Positive & Negative Cricut Cuts

I'm trying to use as much of my paper scraps as I can. When I cut something on the cricut, if the negative image can't be used, I save the scraps for future projects. I have a box I throw all my scraps into, so if I need a small piece of paper for a project I check out the box first.


When I cut out this branch I thought the negative part of the paper could be used as is. I jusr trimmed it to fir the card.

As for the phrases I used on the cards, I googled "friend quotes." I dont have any stamps with phrases so I found a bunch I liked and printed them out myself. Similar to the digital stamps, I like doing the phrases on the computer so I can choose the size and font to better fit with my project.
If a card is more serious, like a sympathy card, you could use a fancier font. For a friendship card (like this one) I like using a font that looks more like it was printed by hand.

March 15, 2010

Watercolour Paints

There is a little craft store near where I live and they have little projects set out near different products. I saw a stamped image done with watercolour paints and thought it looked neat. I bought a pack of 12 Aquacolor crayons and an aqua painter.

The aqua painter is great because you fill the body/handle with water and squeeze it a bit to push more water to the brush end. I need to get a different type of stamping ink that wont run when painted on. For now I stick to using the paints for backgrounds. I have in the past used the paints on an embossed image and it worked great. The raised edges helped keep the colours from mixing. There is specific watercolour paper you can buy. I've used it before but it is quite expensive. I found that using my regular cardstock works fine. The only downfall of the regular cardstock is that if you use a lot of water the paper will curl or warp. I just wait for the card to dry then place a heavy book on it overnight to flatten.


The two cards today have painted backgrounds. I tried to mix the colours to create a sunset in the background on both.

I used a digi-stamp coloured with prismacolor markers.
The heart was coloured pink and then I went over it with my sparkle gell pen.


I cut out the island with my cricut.. and of course I added a small amount of glitter to the sunrise on the yellow and orange areas.

As promised yesterday I have a few stores for you to check out for digi-stamps. Most sites offer a few free stamps so you can try it out and see if you like them.

All That Scraps - I love their stamps!


January 23, 2010

Glass Etching with Cricut

I havent done glass etching since I was a pre-teen. When I bought my cricut expression it came with a package of goodies so the other day I decided to do an etching project. Since I moved a few months ago I havent put up many pictures and I had two large square frames from Ikea with no pictures in them. This was the perfect size for the image I had.


I used the cricut expression to cut a cute phrase out of vinyl. I positioned it on the cutting mat so I would have two seperate pieces. Normally you would take off the background and be left with your image. To use as a stencil you want to take out the image to be left with an outline. *Be careful when removing pieces like the "a" and "b" etc where there is a small piece left in the middle, you want to ensure this doesnt pull off with the rest of the letter. Tweezers or any other small instrument is helpful for this.

If you havent used transfer tape before, it isnt very difficult and is much easier than trying to peel off and apply the vinyl by hand. Cut a piece large enough to cover the entire phrase. Rub the surface to ensure it has adhered to the vinyl. 


Now flip the piece over and peel off the backing. Watch carefully while removing and if a part of vinyl stays on the backing, lay it down a bit and rub that area so it sticks to the transfer tape.

The vinyl and transfer tape are now together and ready to apply to your surface. *Again notice the small pieces inside the "o" "b" etc are in the correct position.

 I wanted the words to be over the matted frame and not cover the image inside. When I applied the vinyl stencil I placed the paper frame underneath to help position it correctly.  Rub the image again to help the vinyl adhere to the glass, then peel off the transfer tape.

Next you apply a thick layer of etching cream and follow the directions on the bottle. Mine sat for 5min before I washed it off.

I pulled off the larger pieces of vinyl easily but was left with the little inside pieces. Using a utility knife or exacto knife helps to get these off.

Here is the finished project. I hung it above the toilet in my bathroom. The shower curtain is also blue and it looks beautiful!


 Here is a closeup of the etching. Its a bit difficult to photograph.


January 19, 2010

Wedding Binder Follow-up

I had a chance to cut some of the bride svg's I talked about here and tried them out for the cover of the wedding binder. I ended up going with the bride with flowers. I cut the words and dress/flowers with a shimmery white that I think adds that special touch. To coordinate with the background paper I used light purple for the base of the bride.


I cut this sillhouette in the shimmery paper as well. I matted it on light purple but felt it was missing something so I added velum under that too.

I think this image is beautiful as well but the other worked for the binder project. I'm sure I'll find another project to use this one on.. and as I'm sure you've figured out, her wedding colour is going to be purple!

January 13, 2010

Wedding Preparation

My best friend is planning to get married in about a year. Loving everything DIY I offered (well almost insisted lol) to be the wedding planner.
I found a site with a great Wedding Organizer Set. You can download a few or all of the worksheets and put them in your own binder. I've seen packages in stores with similar information for $50-$100... So I figured my first wedding related DIY would be this organizer!

I'm going to take a regular three-ringed binder and put in all the printed worksheets. I found a few cute pictures and made a SVG files for the cricut. I'm going to play around with the images and papers to make a cover and I'll post pictures of what I've come up with.

Wedding Organizer Set

Bride
SVG contains two pieces show in black


Bride & Groom
SVG contains two pieces shown in grey and white


Bride with Flowers
SVG contains two pieces shown in black and grey

January 4, 2010

Shooting Stars!

A while ago I found a phrase I thought would be cute to put on the wall of a childs room. For New Years I spent the evening with my best friend and her new family. Baby Lily (3 1/2months) needed some decorations in her room and I thought it would be a perfect opportunity to use the phrase (Twink twinkle little star). And also a perfect excuse to use my new cricut expression!

The walls are greenish so we did the words in a dark blue and the stars yellow.. I'll post a pic soon if I can.
After applying the vinyl and admiring our work, my friend mentioned it would look nice with a shooting star as well. So of course I must get a shooting star for Lily! Today I searched for some inspiration and made a super cute design.
I'm still new at making svg images but thought I would share it.
If you use it for something I would love to see!


Shooting Star svg

Here is a single star incase you want to add a smaller one inside the big star.


**Feel free to use any of my files for your own personal use**

December 5, 2009

Christmas Favors

We're having a large christmas dinner at a hall and I decided to make some favors for each guest to take home with them.

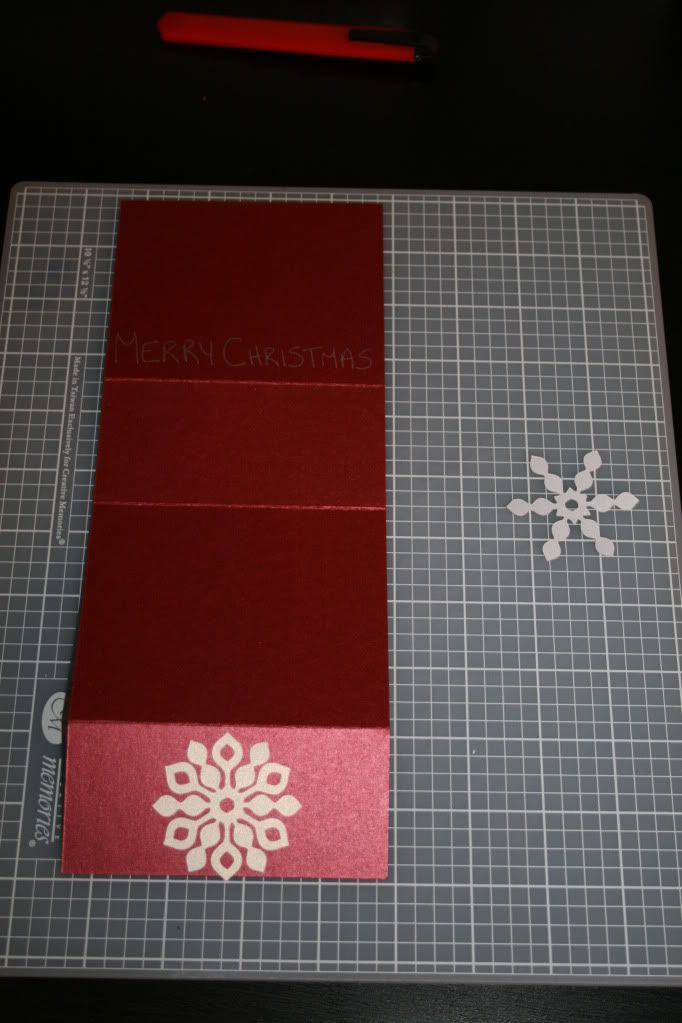
I had red shimmery cardstock (8.5x11") that I cut in half vertically.

I took the picture to better show where I scored the paper. From the top the first score is 3" down, then 2" down from there, then another 4" down.

*I dont have any tools specifically for scoring so I used a ruler and exacto knife to gently cut the line. I made sure not to go all the way through the cardstock. This enables you to make a clean fold.
The snowflake is cut from white shimmery paper. I used the Home Accents cartridge for my cricut to get the snowflake. I got the top of the snowflake by using the shift function on the same image. Both were cut the same size (2" I believe). Any adhesive will work for the first snowflake.


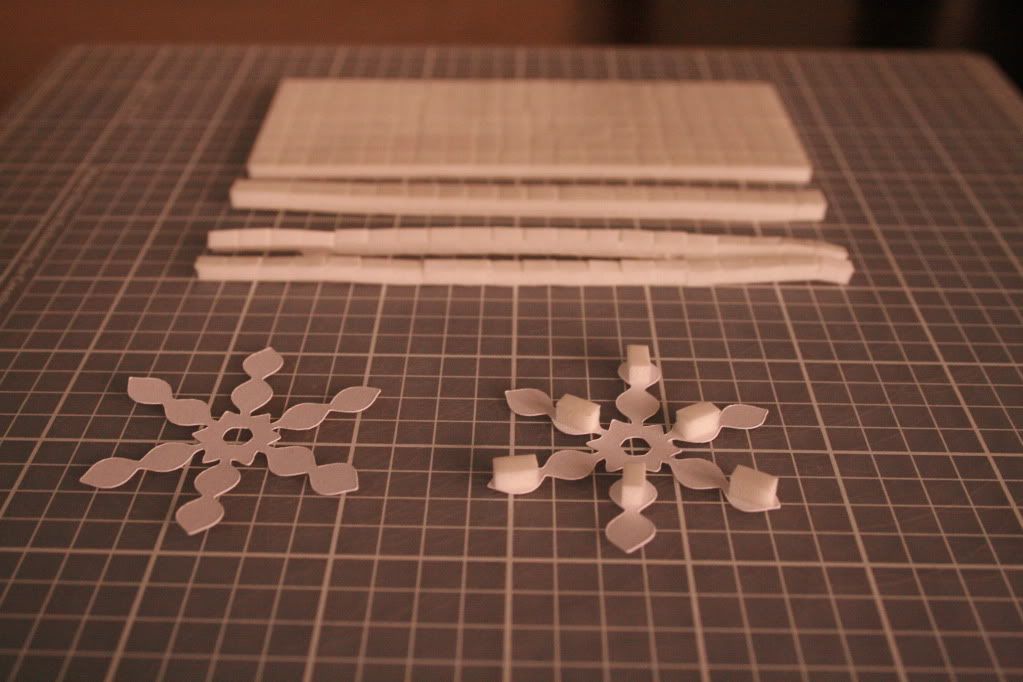
For the second snowflake I used the sticky foam squares. The squares were too big and would show, so I cut them. I cut off one of the strips then cut it in half lengthwise.
Depending on your preference add the foam to the snowflake. I used one piece for each point.
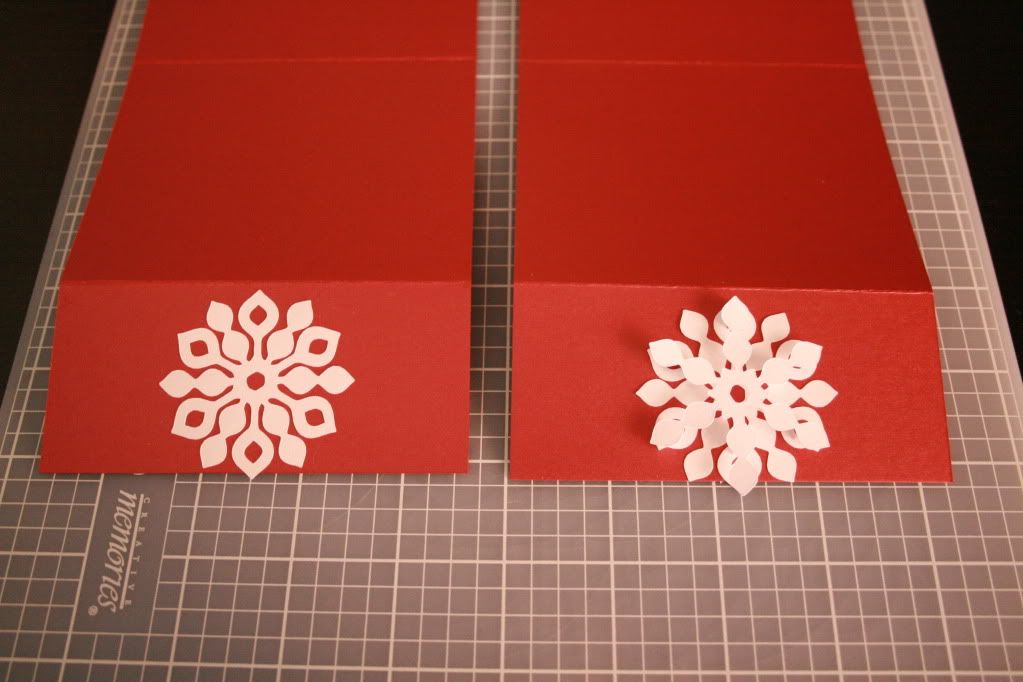
I put the top on so that the points went over the bottom points that had the hole.
Try it out and see which way you like best.


Here you can see it attached.


Once the snowflake is done you can fold it all up.
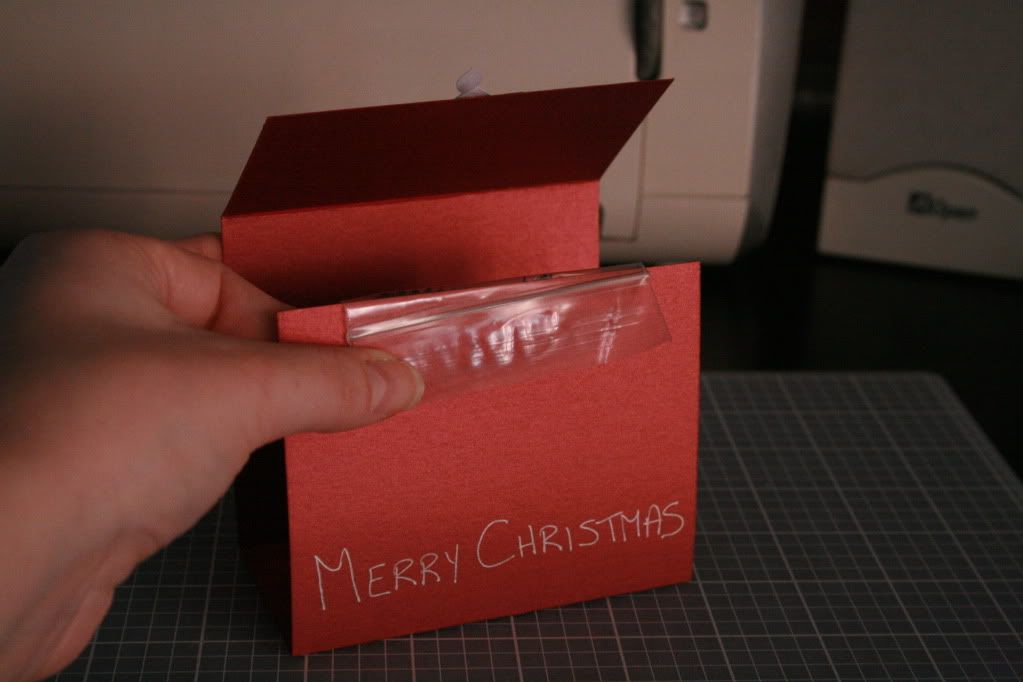
The bag I used for the picture isnt as wide as I want so I didnt attach it. But you would fill the bag with goodies and fold the top over the front then adhere it with whatever product you use.


Finally you fold the front over and secure it with adhesive.

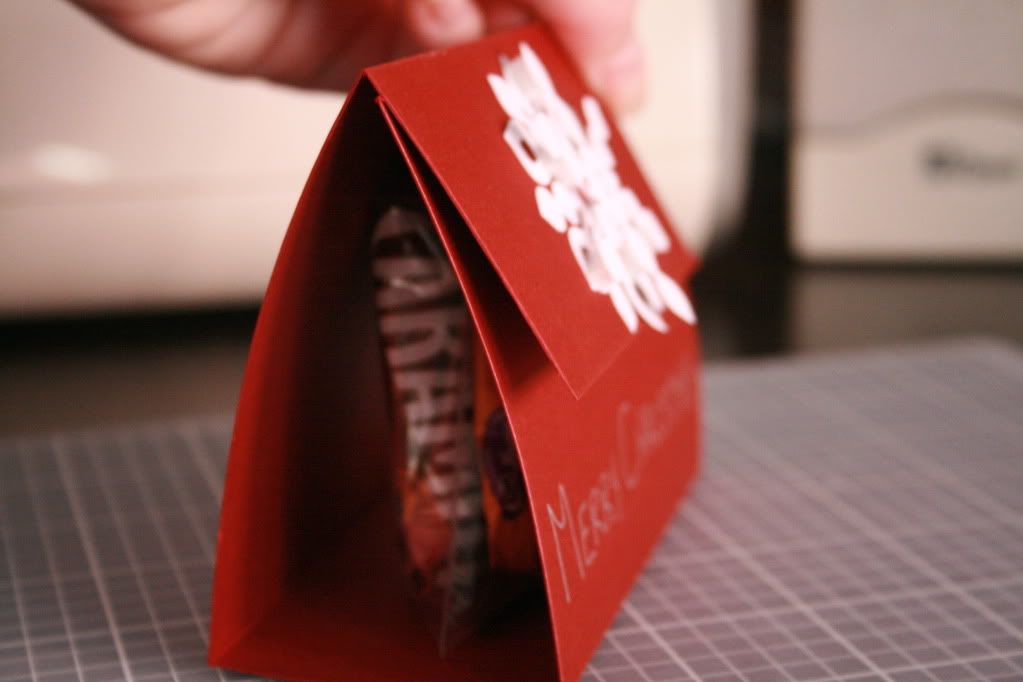
*Here you can see I used the blank space at the bottom to write Merry Christmas with a silver pen.


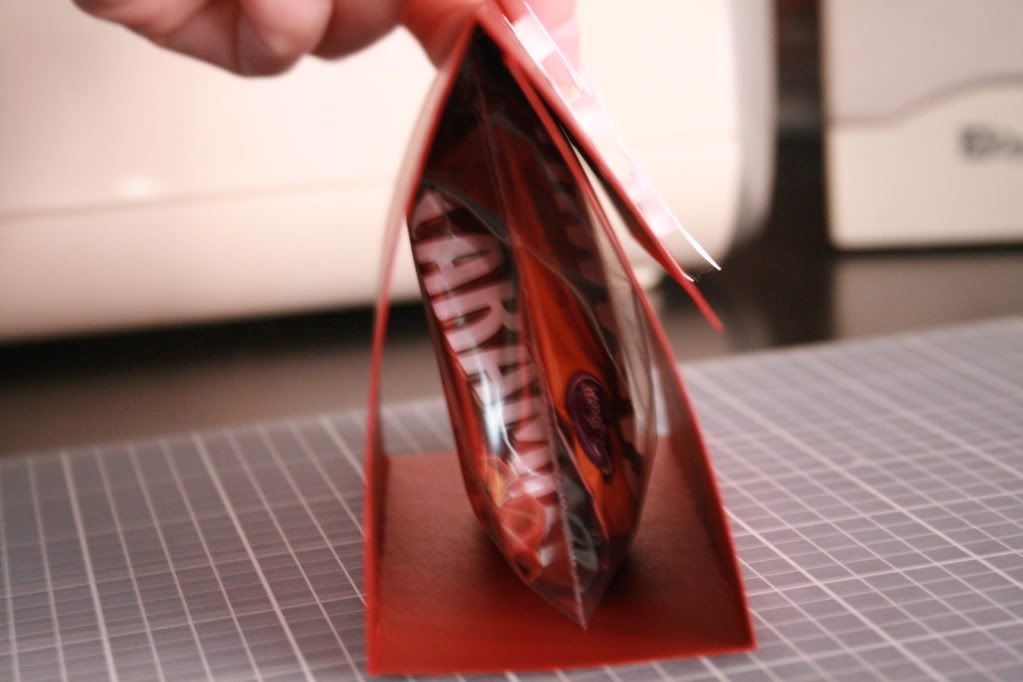
A view from the side to see the candy inside.
Again, I didnt use adhesive and am holding it closed so I can use a bigger bag.


If anyone tries this out I would love to see your variation!

LinkWithin

Related Posts with Thumbnails