I can't stop my obsession! I bought myself a cuttlebug and several embossing folders. The worst part (or the best!) is the $50 gift card to Michaels and $100 to spend on crafty stuff that I got for Christmas. In other words my obsession is being fueled by family and friends so I dont see it ending any time soon : )
Anyways, I ran out of time to post everything before Christmas so here is my last and one of my favorite cards for the holidays.
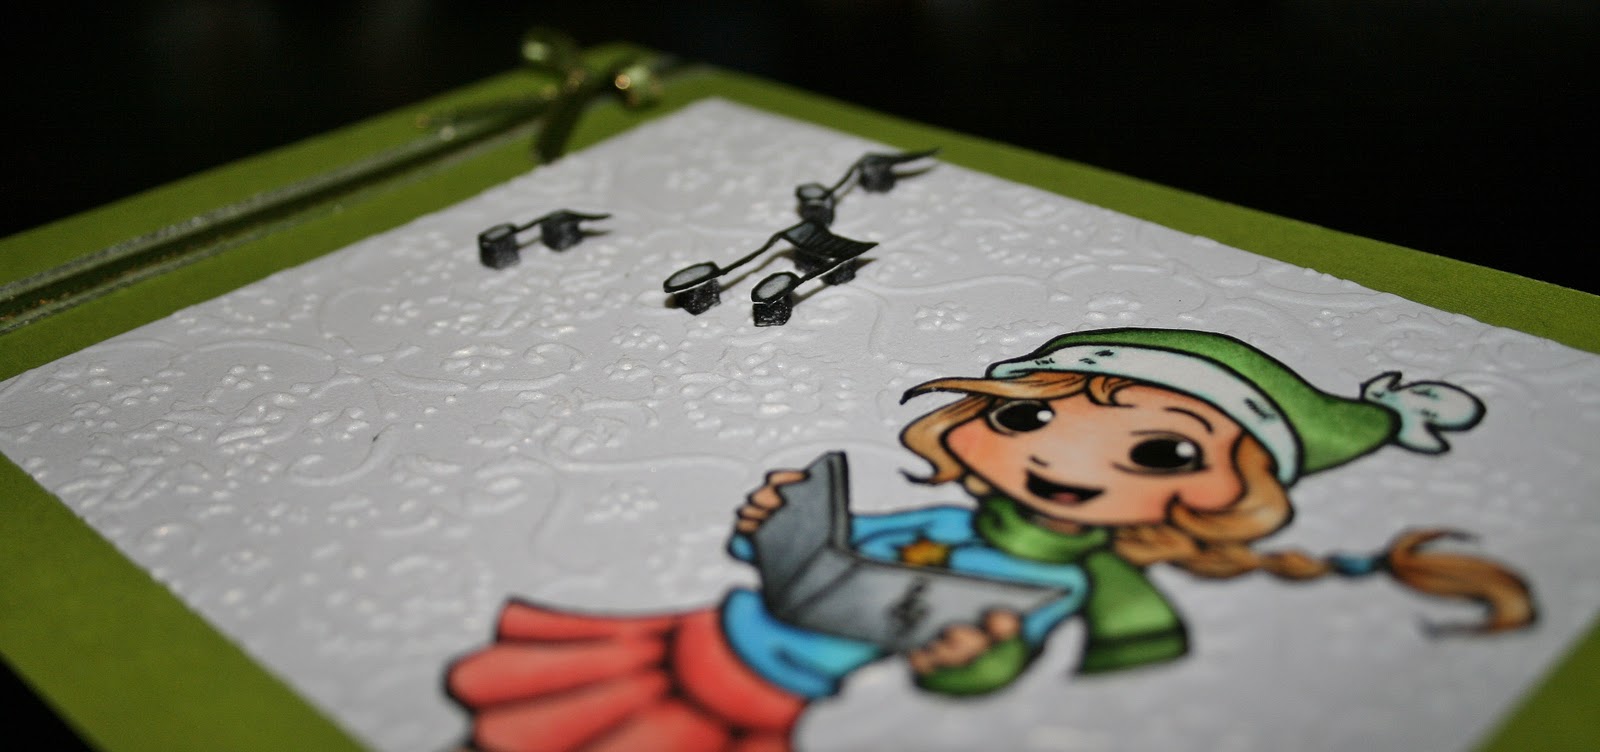
For this card I used some shimmery white paper and embossed it! Oh its fun, I wanted to just emboss paper all night when I got the cuttlebug home, hehe. The girl is from Whiff of Joy Stamps and coloured with copics. I cut out the music notes and popped them up with foam squares.
I layered the green ribbon on top of the silver one then added a bow made with the bow easy. Check out the video. I never used to add bows but this makes it so easy and they always look perfect!
Showing posts with label christmas. Show all posts
December 27, 2010
November 30, 2010
3D Christmas Card
This image is from Stampin' Up and coloured with copics. I like the scene and its somthing different, recently I have been doing images of little girls.
I stamped it twice so I could pop up some of the elements. While looking at the picture and trying to decide what I was going to have pop up I noticed there are so many layers of elements in this scene. I thought about doing the light, the wreath, the skis etc. I finally settled on (with advice from my boyfriend hehe) the tree and sled. The bow is slightly elevated but not as high as the others. The light looked flat so I added crystal effects to help it stand out. I added this to the snow on the tree and the metal part of the sled as well.
The idea for ripping the paper on the side came from the Stampin' Up catalogue.
I stamped it twice so I could pop up some of the elements. While looking at the picture and trying to decide what I was going to have pop up I noticed there are so many layers of elements in this scene. I thought about doing the light, the wreath, the skis etc. I finally settled on (with advice from my boyfriend hehe) the tree and sled. The bow is slightly elevated but not as high as the others. The light looked flat so I added crystal effects to help it stand out. I added this to the snow on the tree and the metal part of the sled as well.
The idea for ripping the paper on the side came from the Stampin' Up catalogue.
| Crystal effects on the light and tree. |
| Crystal effects on the sled metal and stickles on the ornaments. |
December 5, 2009
Christmas Favors
We're having a large christmas dinner at a hall and I decided to make some favors for each guest to take home with them.
I had red shimmery cardstock (8.5x11") that I cut in half vertically.
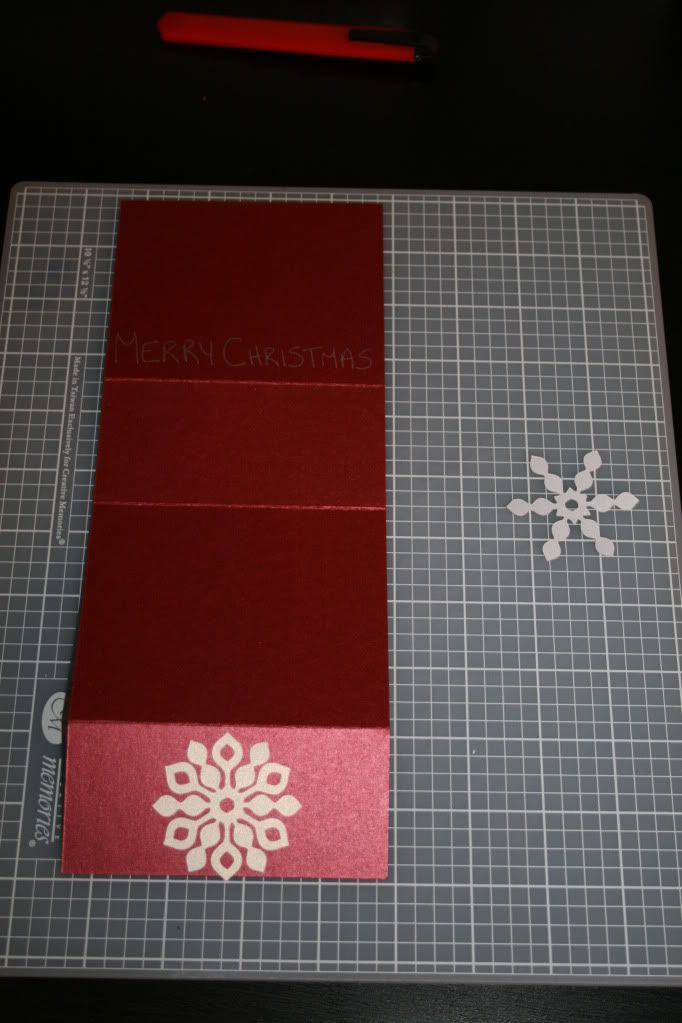
I took the picture to better show where I scored the paper. From the top the first score is 3" down, then 2" down from there, then another 4" down.
*I dont have any tools specifically for scoring so I used a ruler and exacto knife to gently cut the line. I made sure not to go all the way through the cardstock. This enables you to make a clean fold.
The snowflake is cut from white shimmery paper. I used the Home Accents cartridge for my cricut to get the snowflake. I got the top of the snowflake by using the shift function on the same image. Both were cut the same size (2" I believe). Any adhesive will work for the first snowflake.
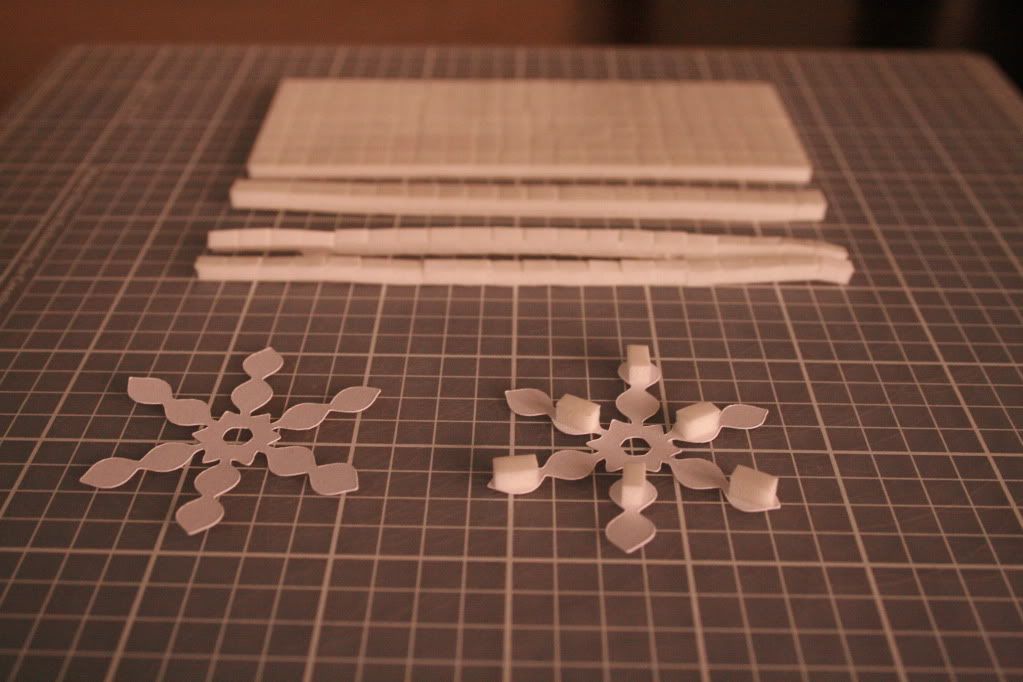
For the second snowflake I used the sticky foam squares. The squares were too big and would show, so I cut them. I cut off one of the strips then cut it in half lengthwise.
Depending on your preference add the foam to the snowflake. I used one piece for each point.
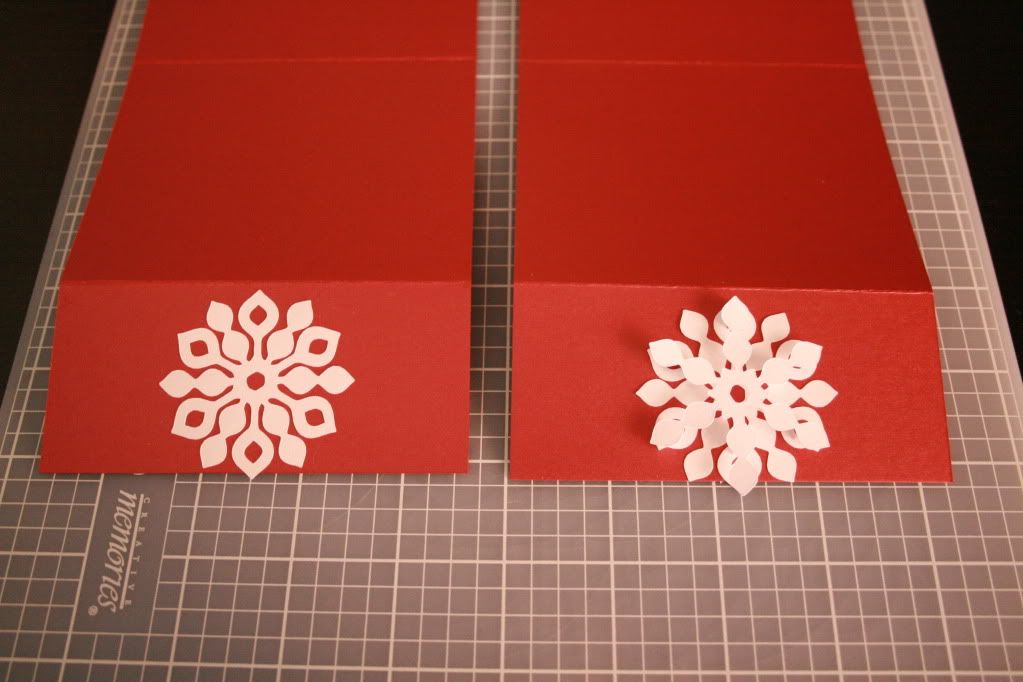
I put the top on so that the points went over the bottom points that had the hole.
Try it out and see which way you like best.
Here you can see it attached.
Once the snowflake is done you can fold it all up.
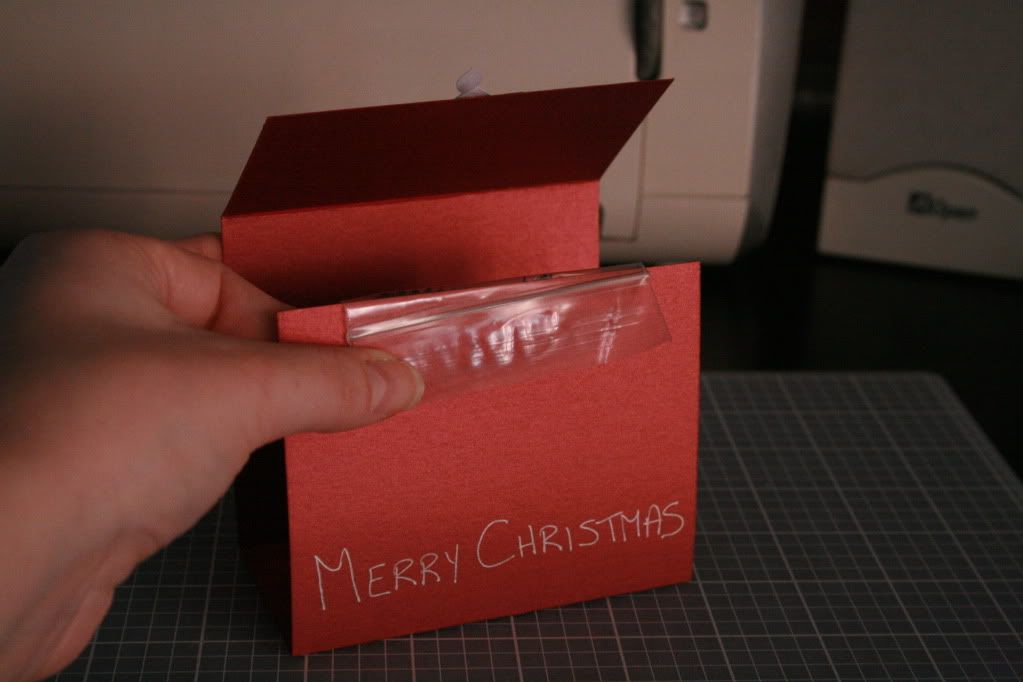
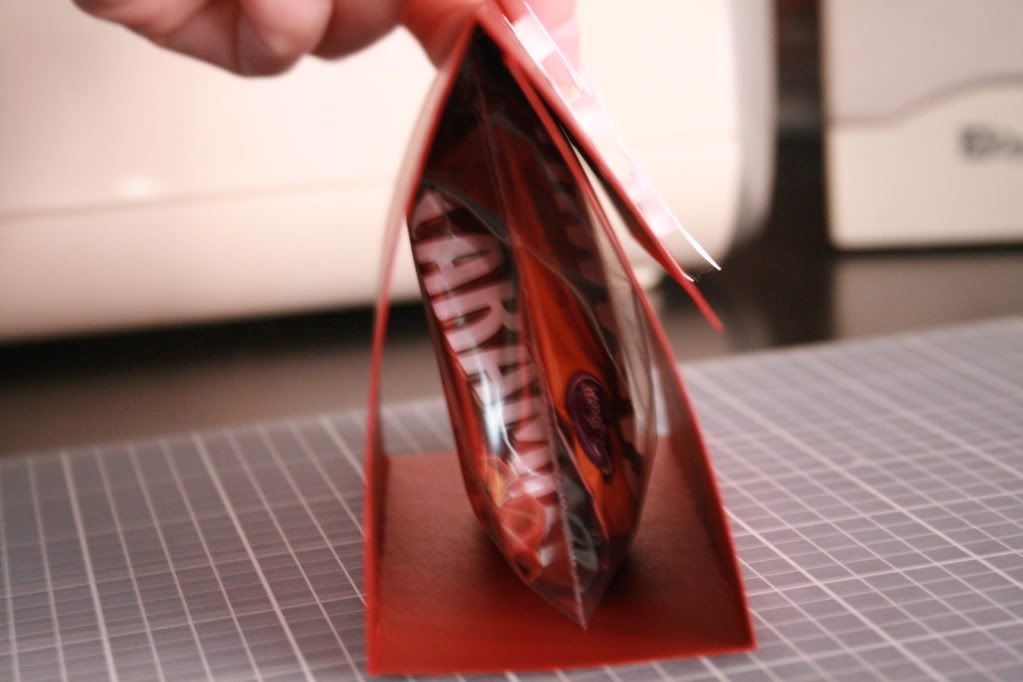
The bag I used for the picture isnt as wide as I want so I didnt attach it. But you would fill the bag with goodies and fold the top over the front then adhere it with whatever product you use.
Finally you fold the front over and secure it with adhesive.
*Here you can see I used the blank space at the bottom to write Merry Christmas with a silver pen.
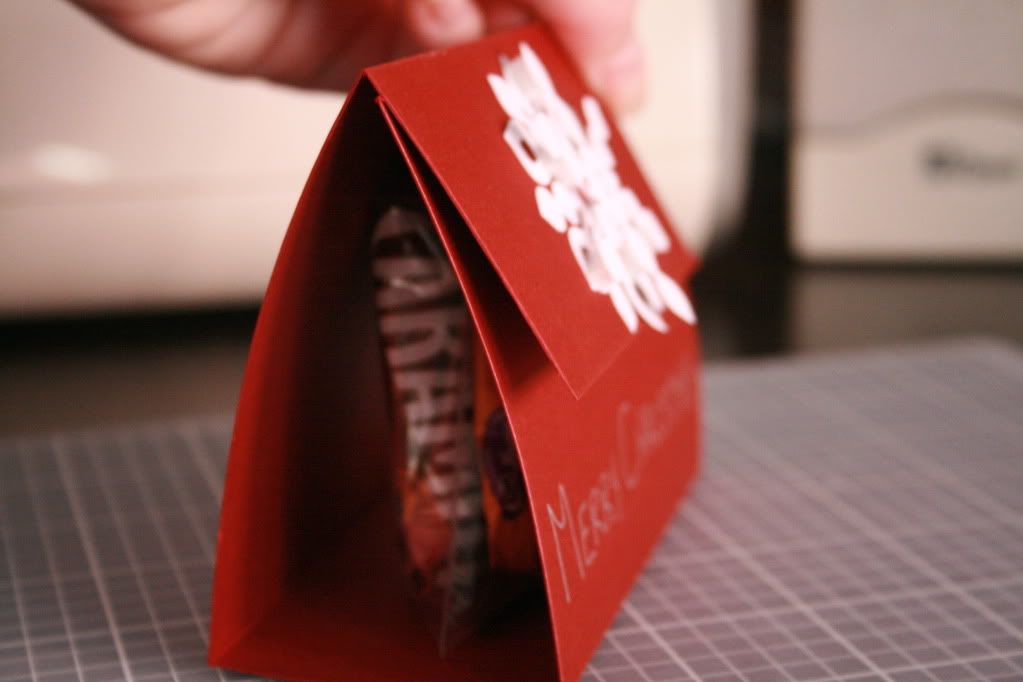
A view from the side to see the candy inside.
Again, I didnt use adhesive and am holding it closed so I can use a bigger bag.
If anyone tries this out I would love to see your variation!
I took the picture to better show where I scored the paper. From the top the first score is 3" down, then 2" down from there, then another 4" down.
*I dont have any tools specifically for scoring so I used a ruler and exacto knife to gently cut the line. I made sure not to go all the way through the cardstock. This enables you to make a clean fold.
The snowflake is cut from white shimmery paper. I used the Home Accents cartridge for my cricut to get the snowflake. I got the top of the snowflake by using the shift function on the same image. Both were cut the same size (2" I believe). Any adhesive will work for the first snowflake.
Depending on your preference add the foam to the snowflake. I used one piece for each point.
I put the top on so that the points went over the bottom points that had the hole.
Try it out and see which way you like best.
The bag I used for the picture isnt as wide as I want so I didnt attach it. But you would fill the bag with goodies and fold the top over the front then adhere it with whatever product you use.
*Here you can see I used the blank space at the bottom to write Merry Christmas with a silver pen.
Again, I didnt use adhesive and am holding it closed so I can use a bigger bag.
If anyone tries this out I would love to see your variation!
Subscribe to:
Posts (Atom)